Configuração do Servidor DHCP
netsh dhcp server \\FQDNdoservidor dump > dhcp.txt
netsh exec dhcp.txt
Reservas do Servidor DHCP
netsh dhcp server <serverIPAddress> scope <scopeAddress> dump>dump.txt
netsh exec exportedreserv.txt
Configuração do Servidor DHCP
netsh dhcp server \\FQDNdoservidor dump > dhcp.txt
netsh exec dhcp.txt
Reservas do Servidor DHCP
netsh dhcp server <serverIPAddress> scope <scopeAddress> dump>dump.txt
netsh exec exportedreserv.txt
sudo dd if=/dev/zero of=/var/swapfile bs=1M count=2048
sudo chmod 600 /var/swapfile
sudo mkswap /var/swapfile
echo /var/swapfile none swap defaults 0 0 | sudo tee -a /etc/fstab
sudo swapon -a
Créditos: http://porzky.com/2013/06/lack-of-free-swap-space-on-zabbix-server/
To configure the license server on RDSH/RDVH:
$obj = gwmi -namespace “Root/CIMV2/TerminalServices” Win32_TerminalServiceSetting
$obj.SetSpecifiedLicenseServerList(“License.contoso.com”)
Note “License” is the name of the License Server in the environment
To verify the license server configuration on RDSH/RDVH:
$obj = gwmi -namespace “Root/CIMV2/TerminalServices” Win32_TerminalServiceSetting
$obj.GetSpecifiedLicenseServerList()
To change the licensing mode on RDSH/RDVH:
$obj = gwmi -namespace “Root/CIMV2/TerminalServices” Win32_TerminalServiceSetting
$obj.ChangeMode(value) – Value can be 2 – per Device, 4 – Per user
To validate the licensing mode:
$obj = gwmi -namespace “Root/CIMV2/TerminalServices” Win32_TerminalServiceSetting
$obj. LicensingType
$obj.LicensingName
Créditos: http://blogs.technet.com/b/askperf/archive/2013/09/20/rd-licensing-configuration-on-windows-server-2012.aspx
Step 1: Rename ADDS Domain Name
1. Open Command Prompt in Administrator Mode
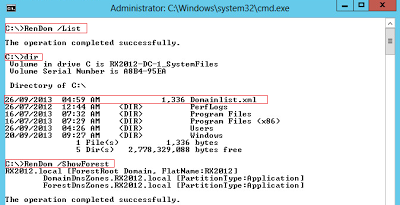
2. Execute ‘RenDom /List’ to generate Forest Naming Context in XML file
Execute ‘RenDom /ShowForest’ to view auto generated xml of current domain
3. Update the current domain name with new domain name and save the file
In this tutorial, rename domain name ‘RX2012’ to ‘RX1201’
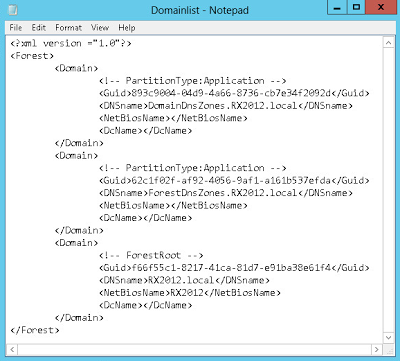
4. Execute ‘RenDom /ShowForest’ to view the new domain name in xml file

5. Execute ‘RenDom /Upload’ to the domain name changes from xml file
6. Execute ‘RenDom /Prepare’ to start prepare domain name rename

7. Execute ‘RenDom /Execute’ to start domain name rename process.
After this process completed, the server will be automatically rebooted.

8. After the server reboots, pls take note to switch user to logon with new domain name
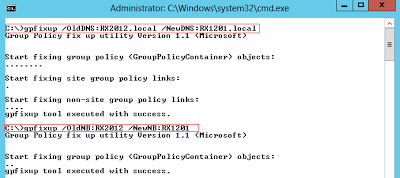
Step 2: Fix Up Group Policy After Domain Name Rename
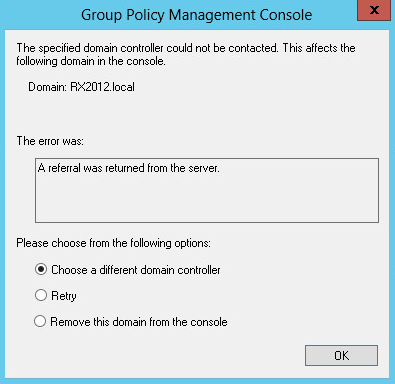
1. After rename process completed, GPMC will need to be fix up to use the new domain name.
You will encounter the following error:
2. Execute two commands to fix GPMC (DNS & NetBIOS Name):
– Execute ‘gpfixup /OldDNS:<OLD_DOMAIN_NAME> /NewDNS:<NEW_DOMAIN_NAME>’
Step 3: Rename Server Domain

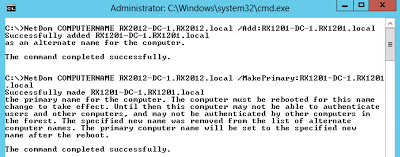
3. Restart server
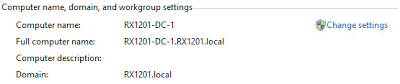
Step 4: Finalize Domain Name Rename
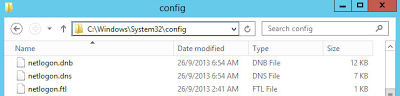
Step 5: Fix DNS for new Domain Name
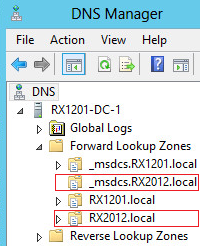
1. Open ‘DNS Manager’

2. Open ‘File Manager’ and Navigate to ‘%WINDIR%\System32\Config’ and backup
DNS netlogon file as shown below
3. Delete the new zone created automatically during Rename Domain process

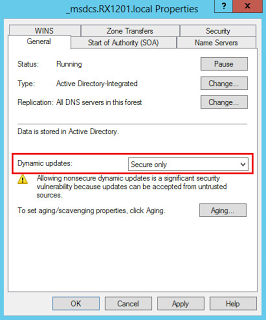
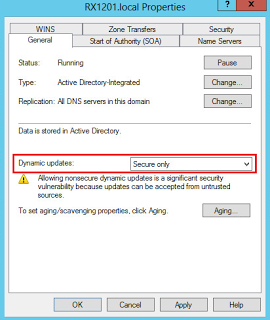
4. Create Two Active-Directory Primary Integrated DNS Forward Lookup Zone

5. Open Properties of new zone and set ‘Dynamic updates’ to ‘Secure Only’
6. Restore DNS Netlogon file into ‘%WINDIR%\System32\Config’
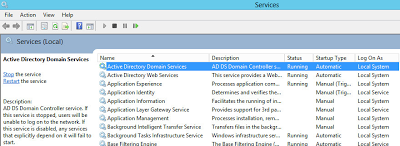
7. Restart ‘Active Directory Domain Services’ Service
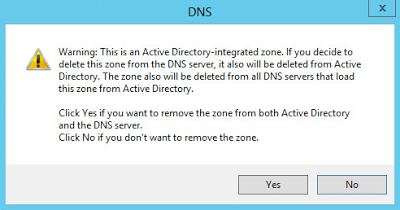
8. Delete Old Domain Name DNS Zone as highlighted in red box.
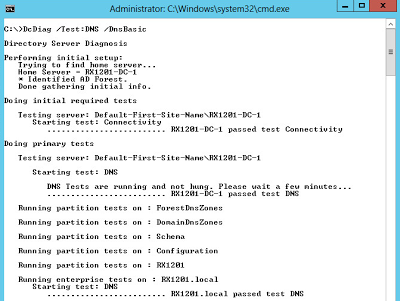
9. Test DNS using DcDiag Tool
Execute ‘DcDiag /Test:DNS /DnsBasic’
Créditos: http://ylnotes.blogspot.com.br/2013/09/rename-active-directory-domain-name-for.html
Créditos: http://mizitechinfo.wordpress.com/2013/06/10/simple-guide-how-to-rename-domain-name-in-windows-server-2012/
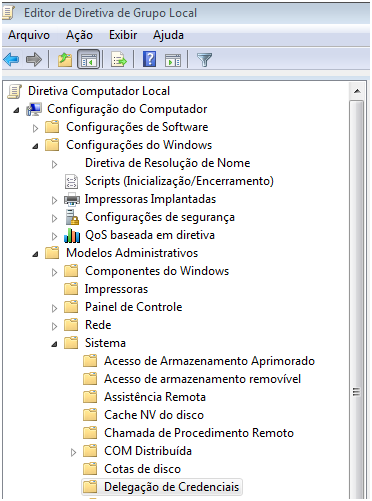
Clique no botão Iniciar![]() , Digite gpedit.msc e pressione ENTER.
, Digite gpedit.msc e pressione ENTER. ![]() Se você for solicitado a informar uma senha de administrador ou sua confirmação, digite a senha ou forneça a confirmação.
Se você for solicitado a informar uma senha de administrador ou sua confirmação, digite a senha ou forneça a confirmação.
Em Configuração do Computador, clique duas vezes em Modelos Administrativos, emSistema e, por fim, em Delegação de Credenciais.
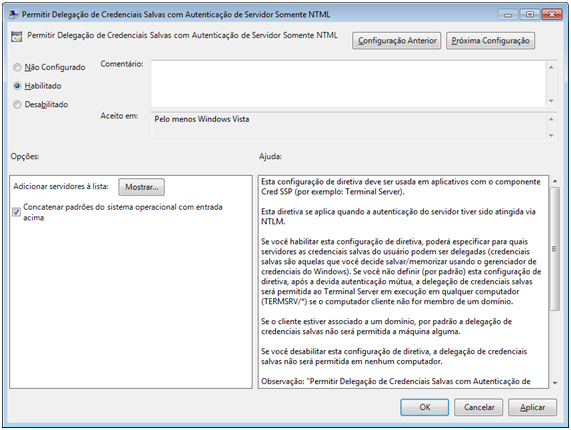
No painel direito, clique duas vezes em Permitir Credenciais Salvas com Autenticação de Servidor Somente NTML.
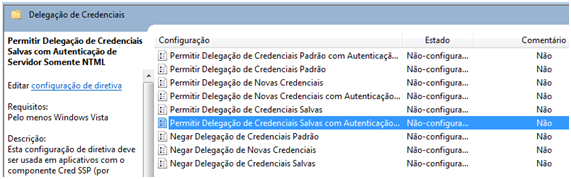
Na caixa de diálogo exibida, clique em Habilitado e em Mostrar.
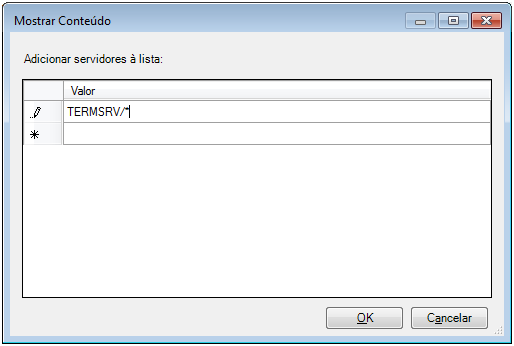
Na caixa de diálogo Mostrar Conteúdo, clique em Adicionar, digite o nome do computador remoto (servidor) neste formato: TERMSRV/* e, em seguida, clique em OK.
Crédito: http://blog.douglasfilipe.com.br/2010/04/23/area-de-trabalho-remota-nao-salva-credenciais/
C:\> Diskpart
DISKPART> list disk
DISKPART> select disk (id)
DISKPART> online disk (if the disk is not online)
DISKPART> attributes disk clear readonly
DISKPART> clean
DISKPART> convert mbr (or gpt)
DISKPART> create partition primary
DISKPART> select part 1
DISKPART> active (if this is the boot partition)
DISKPART> format fs=ntfs label=(name) quick
DISKPART> assign letter (letter)
DISKPART> list volume
Créditos: http://www.jwgoerlich.us/blogengine/post/2009/11/05/Use-Diskpart-to-Create-and-Format-Partitions.aspx
NET accounts /MAXPWAGE:UNLIMITED
Fonte: http://blog.malevy.net/2010/08/disable-password-expiration-on-windows.html
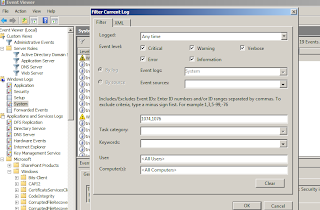
Abra o EventViewer, Windows Logs, e clique com o botão direito sobre System, selecionandoFilter Current Log. Pode selecionar todos os Event Level e no campo de Event ID digite 1074, 1076.
mount.cifs  //172.27.0.190/Moodle$ /srv/www/moodledata \
  -o username=LHU/moodledata,password=<password> \
  -o rw,dir_mode=0777,file_mode=0777,uid=root,gid=root
Fonte: http://unix.stackexchange.com/questions/86114/issues-mounting-a-ntfs-share-on-centos-6-3
For other remote admin like Event Viewer, Volume Management etc. some firewall rules need to be enabled:
netsh advfirewall firewall set rule group=”Remote Administration” new enable=yes
netsh advfirewall firewall set rule group=”File and Printer Sharing” new enable=yes
netsh advfirewall firewall set rule group=”Remote Service Management” new enable=yes
netsh advfirewall firewall set rule group=”Performance Logs and Alerts” new enable=yes
Netsh advfirewall firewall set rule group=”Remote Event Log Management” new enable=yes
Netsh advfirewall firewall set rule group=”Remote Scheduled Tasks Management” new enable=yes
netsh advfirewall firewall set rule group=”Remote Volume Management” new enable=yes
netsh advfirewall firewall set rule group=”Remote Desktop” new enable=yes
netsh advfirewall firewall set rule group=”Windows Firewall Remote Management” new enable=yes
netsh advfirewall firewall set rule group=”windows management instrumentation (wmi)” new enable=yes
sc config vds start= auto
net start vds
(for readonly remote device manager I enabled GPO “Allow remote access to the Plug and Play interface”, but still got an error trying to open a remote device manager)
For other remote admin like Event Viewer, Volume Management etc. you also need to open firewall on client using script above.
Tested this on the RC version of both server and client.
Créditos: http://publicjotting.blogspot.com.br/2012/06/hyper-v-server-2012-and-remote-hyper-v.html